
A strop is the reason some people’s knives fall through a tomato while yours, fresh off the same stone, still feels a little grabby. Sharpening leaves behind a burr, a wire of weakened steel clinging to the very edge, plus fine scratches from the stone. A few passes on leather pull that burr off and polish the scratches down, and the edge goes from sharp to properly keen.
The technique fits in one sentence: hold the blade at your sharpening angle and drag it backward, spine first, so the edge trails behind and never digs into the leather. Everything else in this guide (compound, pressure, stroke count, which strop) is detail around that rule. My first recommendation is the SHARPAL 205H paddle strop, because it’s long enough for kitchen knives and comes with compound and an angle guide.
What Stropping Does (and What It Can’t Do)
Stropping is the last, gentlest step of sharpening. It does three small jobs: it removes the burr the stone left, it polishes the scratch pattern on the edge bevel, and it nudges a slightly bent edge back into line. Done after every sharpening, it makes the edge feel noticeably keener and helps it stay that way longer.
What a strop can’t do is create an edge. Leather and compound remove so little steel that a dull, rounded or chipped knife won’t come back however long you strop it. If a knife still slides off a tomato after about 30 strokes, it needs a stone or a sharpener first. My guide to the best knife sharpeners covers the tools for that step.
Strop vs Honing Rod vs Sharpener
People mix these three up all the time, and they do overlap a little. Here’s how I separate them.
| Tool | Removes steel? | Main job | When to use it |
|---|---|---|---|
| Sharpener (stone, guided, electric) | Yes, a real amount | Grinds a new edge on a dull knife | Every few months, or when honing stops working |
| Honing rod (steel or ceramic) | Very little (ceramic a touch more) | Pushes a bent edge back into line | Weekly, or before a big cooking session |
| Leather strop with compound | A tiny amount | Removes the burr and polishes the edge | Right after sharpening, then for quick touch-ups |
| Bare leather strop | Almost none | Final polish and realignment | Between uses, on edges that are already sharp |
In a kitchen, a ceramic rod and a strop do similar upkeep work, so you don’t strictly need both. Pocket and outdoor knife owners tend to prefer the strop, since it packs flat and nothing on it can chip a thin edge.
Paddle, Bench or Hanging: Which Strop Suits a Knife
Paddle strops are leather glued to a wooden board with a handle. You can hold one in the air or lay it on a table, and most have leather on both sides. This is the type I’d buy for knives.
Bench strops are the same idea without a handle: a wider, heavier block that stays put on the counter. They’re comfortable for long kitchen knives because you get the full stroke without the board moving.
Hanging strops are the long leather straps you see in barbershops, fixed at one end and pulled tight by hand. They’re made for straight razors. The leather sags a little under the blade, and on a knife that sag tends to round the edge over, so I’d leave them to razor users.
In a pinch, almost anything flat and slightly yielding works: a strip of thick cardboard, the back of an old leather belt glued to a block, or folded denim over a flat surface. Cardboard loaded with compound is surprisingly effective. A proper strop is just easier to hold at a steady angle and lasts for years.
Stropping Compounds and Grits Explained
Compound is a fine abrasive in a wax or paste carrier. You rub it on the leather and it does most of the cutting. Bare leather polishes too, only much more slowly. Colors are not standardized between brands, so treat the color as a hint and check the grit or micron size the maker lists.
| Compound | What it does | Use it after | Best for |
|---|---|---|---|
| Coarse (often black or gray) | Takes off a stubborn burr, leaves a slightly toothy edge | A coarse stone or a pull-through sharpener | Outdoor knives, rope and cardboard cutting |
| Medium (often white) | Bridges the gap between coarse and fine | A 1000 grit stone | A middle step if you use more than one bar |
| Fine green (chromium oxide) | Bright, very keen polish (SHARPAL rates its green at 1 to 2 microns) | A 1000 to 6000 grit stone | Kitchen and pocket knives; the only bar most people need |
| Diamond spray or paste | Cuts any steel, graded by microns | Fine stones or diamond plates | Hard, wear-resistant steels where green compound barely bites |
| No compound (bare leather) | Gentlest polish and realignment | A strop loaded with compound, or a very fine stone | Daily touch-ups, already sharp edges |
Keep one compound per strop surface. If coarse particles end up on your fine side, they’ll scratch the polish you’re trying to create. That’s why two-sided strops are handy: compound on the smooth side, bare suede on the other.
How to Strop a Knife, Step by Step
Step 1: Set up a steady strop
Lay a paddle or bench strop flat on a table, handle toward you or pointing away, whichever lets you pull long strokes comfortably. A damp towel underneath stops it sliding. Holding a paddle in the air works once you’re confident, but the table is easier to start with.
Step 2: Load the compound
Rub the bar onto the leather like a crayon, a thin, even layer along the whole length. More isn’t better: thick compound clumps, and those clumps round the edge.
Step 3: Find your angle
Lay the blade flat on the leather, edge toward you, then lift the spine until the edge bevel sits flat on the surface. That’s roughly the angle you sharpened at; go a hair higher rather than lower. The marker trick helps: color the edge bevel with a permanent marker, do one stroke, and check that ink came off right at the edge. If it only came off the shoulder of the bevel, raise the spine a little.
Step 4: Pull the blade spine first
Draw the knife away from the edge, so the spine leads and the edge trails behind. Sweep the blade sideways as you pull, so the stroke starts at the heel and ends at the tip and the whole edge gets the same treatment. Use about the weight of the knife plus a little more. If the leather dents under the edge, you’re pressing too hard.
Step 5: Flip in the air and alternate
At the end of each stroke, lift the blade off the leather before you flip it, then pull the other side back toward you the same way. Rolling the knife over its edge while it’s still on the strop is the most common way people round a fresh edge. Do 10 to 20 strokes per side, then finish with five or six single alternating strokes using even less pressure.
Step 6: Test the edge
Slice a sheet of printer paper or the skin of a tomato. A well-stropped edge glides through without snagging. A snag in one spot usually means a leftover burr or a small chip there; a drag along the whole length means the knife needs the stone again. I walk through these checks in more detail in is my knife sharp enough?
Stropping Different Kinds of Knives
German and Japanese kitchen knives
Both strop well. Match the angle each knife was sharpened at: around 20 degrees per side is typical for German knives, around 15 for most Japanese ones. Hard Japanese steel takes a particularly bright edge from green compound, and a strop is far gentler on it than a coarse pull-through. Single-bevel knives such as a yanagiba get their strokes on the beveled side, plus one or two strokes with the flat back laid completely flat on the leather to clear the burr. If you’re just starting with Japanese knives, my guide to sharpening Shun knives covers the stone steps that come before the strop.
Pocket and outdoor knives
These are where a strop earns its keep, because a few strokes at camp or at the end of a workday keep an edge going for weeks between real sharpenings. Convex edges, common on axes and some bushcraft knives, are traditionally maintained on a strop; the slight give of suede follows the curve better than a hard surface. For the stone work before stropping, see my guide to sharpening a pocket knife.
Ceramic knives
Skip the green compound here. Zirconia ceramic is far harder than any steel, so ordinary compounds and bare leather do essentially nothing to it. Only diamond abrasives cut ceramic, and the burr-and-polish logic of stropping barely applies. My guide on how to sharpen a ceramic knife covers the diamond tools that work.
Serrated knives
A flat strop only touches the tips of the teeth, so it won’t sharpen the scallops. You can strop the flat back of a serrated blade to remove the burr after sharpening the teeth with a tapered rod, and that’s about it.
Stropping Mistakes That Round an Edge
Leading with the edge
Pushing the edge into the leather cuts the strop and folds the edge over. Every stroke is spine first, without exception.
Too much pressure
Heavy pressure pushes the edge down into the leather, which then wraps around it and rounds it. Light strokes do the job; heavy ones undo it.
Raising the spine too high
A slightly higher angle than your sharpening angle is fine. Much higher, and you’re polishing a new, blunter micro-bevel onto the edge.
Stropping a dull knife
If 30 strokes don’t bring the edge back, more won’t either. It’s time for a stone.
Letting grit onto the leather
Dust and grit scratch the edge you’re polishing. Store the strop covered or in a drawer, and keep coarse compound off the fine side.
How Often Should You Strop?
Strop every time you sharpen, as the finishing step. Between sharpenings, ten or so light strokes per side whenever the knife starts to feel less keen (often once a week for a kitchen knife, more often for a pocket knife in daily use) keeps the edge going far longer. When stropping stops bringing it back, it’s time to sharpen again.
Look after the strop itself too. It will darken over time from fine steel particles mixed into the compound; that’s normal and it still works. When the surface gets clogged or glazed, scrape the old compound off with the spine of a knife and load a fresh layer.
Tools I’d Use
A strop and a bar of compound are all you need; the small strop is for knives you carry.
1. SHARPAL 205H Double-Sided Leather Strop: The One I’d Start With

13.2 inches of vegetable-tanned cowhide on a wooden paddle, long enough to pull a chef’s knife heel to tip in one stroke, with a smooth side and a suede side. The kit adds 2 oz of green compound and an angle guide that shows what a correct angle looks like. At 2.4 inches wide it’s narrower than a bench strop, and it wants a towel underneath on a table.
2. BeaverCraft LS2P1 Leather Strop, 3 x 8 Inch: For Knives You Carry

A pocket-size double-sided leather block from a maker of wood carving tools, with compound in the kit: smooth side for compound, rough side bare. Eight inches suits folders and fixed blades up to about four inches and weighs next to nothing in a pack. It’s too short for an 8 inch chef’s knife.
3. SHARPAL 209H Fine Green Polishing Compound, 8 oz: To Keep Any Strop Working
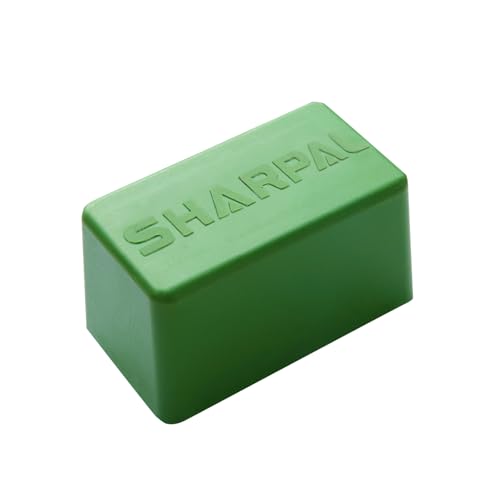
Aluminum oxide and chromium oxide at 1 to 2 microns per SHARPAL: fine enough for a keen kitchen edge, quick enough to clear a pocket knife’s burr. A thin layer goes a long way, so one bar outlasts several strops. On very hard, wear-resistant steels it barely bites; use diamond paste there.
FAQ
Do you need compound to strop a knife?
No, bare leather works, it just polishes much more slowly. Compound makes stropping faster and the edge brighter, which is why most people load one side of the strop and keep the other bare.
Which side of a strop do you use first?
The side with compound first, to remove the burr and polish the edge. Then a few strokes on the bare side, usually suede, to finish. If both sides are bare, start on the firmer smooth side.
How many strokes should you strop a knife?
About 10 to 20 per side after sharpening, then a few light single alternating strokes. For a quick touch-up, five to ten per side is plenty. If 30 strokes don’t help, the knife needs sharpening instead.
Can you strop a knife on cardboard or denim?
Yes. Flat cardboard, especially with a little compound rubbed on, works well, and denim stretched over a flat surface does too. Use the same spine-first stroke and light pressure as on leather.
Can stropping ruin a knife?
It can round the edge if you lead with the edge, press hard, raise the angle too high or use a saggy strop. Done with light, edge-trailing strokes at the right angle, it only makes an edge sharper.
Is stropping the same as honing?
Not quite. Honing on a rod mostly straightens a bent edge; stropping removes the burr and polishes the edge. A ceramic rod and a loaded strop overlap a bit, but they’re used at different moments.
Final Verdict
Stropping takes a couple of minutes and adds the finish that turns a sharpened knife into a really sharp one. Remember the one rule (spine first, edge trailing), keep the pressure light and the angle close to your sharpening angle, and stop when the edge glides through paper. Recharge the compound when the leather stops darkening, and strop a little after every sharpening rather than a lot once in a while.

Gary Portman founded knivesadvice.com in 2019. He learned to cook in his family’s kitchen as a kid and has used kitchen, pocket and outdoor knives ever since, from paring and fillet knives to survival blades he carries camping and hiking. He writes the site’s buying guides, brand reviews and sharpening how-tos to help readers find the right knife for the job. More about Gary.