Learning how to hold a kitchen knife will help you become the cooking pro you’ve always wanted to be. This will also boost your confidence in the kitchen, prepare you to cut more efficiently, and cut faster. You don’t need to be a professional chef to master these grips; you just need to be willing to learn.
Some of these grips might take time before you feel comfortable using them, but with enough practice, you’ll get there. Now, let’s start with how you should hold different knives and discover the five most common grips.
How To Hold Different Knives
Most of the kitchen knives that you regularly use require similar grip techniques. Before we get more into detail, this is how you should hold the knives:
- Chef knife- you can use the handle technique or the blade grip to hold a chef knife.
- Bread knife- the best grip technique for a bread knife is the handle gripping technique.
- Santoku knife– the pinch grip is the best way to hold this knife, but if you’re a beginner, you can use the handle technique.
- Cleaver knife- you can either use the handle or the grip technique.
- Fillet knife– grip the handle with your fingers, place the thumb on the blade on the opposite side, and the index finger on top of the blade.
Basic Knife Grips
These are the basic holding knife grips that you need to know about when in the kitchen:
-
Handle Grip
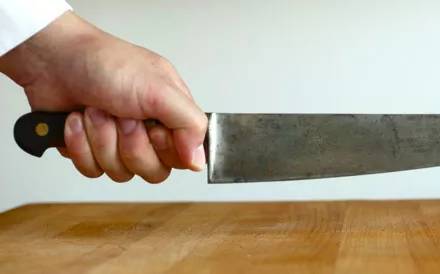 The handle grip is the best technique for beginner chefs who are learning how to hold a knife. It means that your hand with all the fingers is around the knife handle and behind the bolster. The bolster is the spot where the knife blade meets the handle. Another great use of this grip is for cooks with very small hands.
Although it’s simple to learn, it doesn’t offer enough precision while you’re cutting.
-
Blade Grip
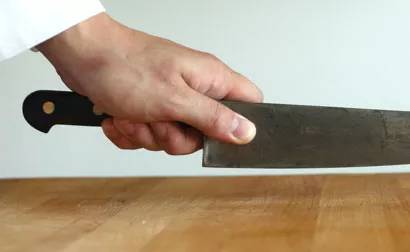 This is another common grip, but it’s more suitable for professional chefs. For this technique, two of your fingers (forefinger and thumb) are placed right in front of the bolster, one on each side of the blade. The rest of your fingers should be around the handle.
This grip gives you more control over the knife and better precision. You’ll also find it referred to as the pinch grip.
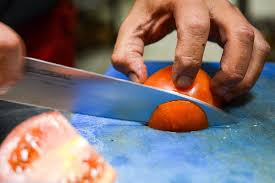
When using the chef’s grip, you should place the ingredient on a cutting board and secure it with the guide hand. While you hold the ingredient, keep your fingers tucked and slightly curl them inwards.
-
Dagger Grip
The dagger knife grip is not as commonly used among cooks, but it’s an excellent choice for fishermen and butchers. It gives a lot of strength and can help the person cut through bones and cartilage.
It’s very similar to the handle technique, with the only difference that the blade is in the counter direction, and you’re holding the knife like a dagger.
-
Point Grip
For this technique, you should place your index finger on the blade’s spine. Have you seen how a surgeon holds a scalpel when cutting? Well, this is pretty much the same grip; you’re just doing it with a knife. Don’t forget to sharpen your blade; otherwise, the technique won’t be as effective.
-
Toward The Thumb Grip
 If your knife skills are advanced, you’ll find this grip very easy. Your four fingers should be placed around the handle, and you’ll use the thumb to move the ingredient towards the blade. This is the best grip for smaller knives with a narrow and sharp blade. You should be very precise and skilled if you want to use the toward-the-thumb grip.
Conclusion
After reading about these grips, are you ready to demonstrate how to hold a knife in your kitchen? As we mentioned, the handle technique is best for beginners who are just starting with the basics. Once you’ve tackled this one, you can continue with the blade technique. The dagger, point, and toward the thumb grip aren’t used as often, but it’s good to know them just in case.

Gary Portman is the founder and main author of Knivesadvice.com. With his extensive knowledge and experience, he is committed to assisting people in choosing the perfect knife for their needs. Through his articles, Gary shares valuable insights on various aspects of knives. With his expertise, readers can make informed decisions and find a knife that is tailored to their preferences and requirements. You can find more info about Gary here.